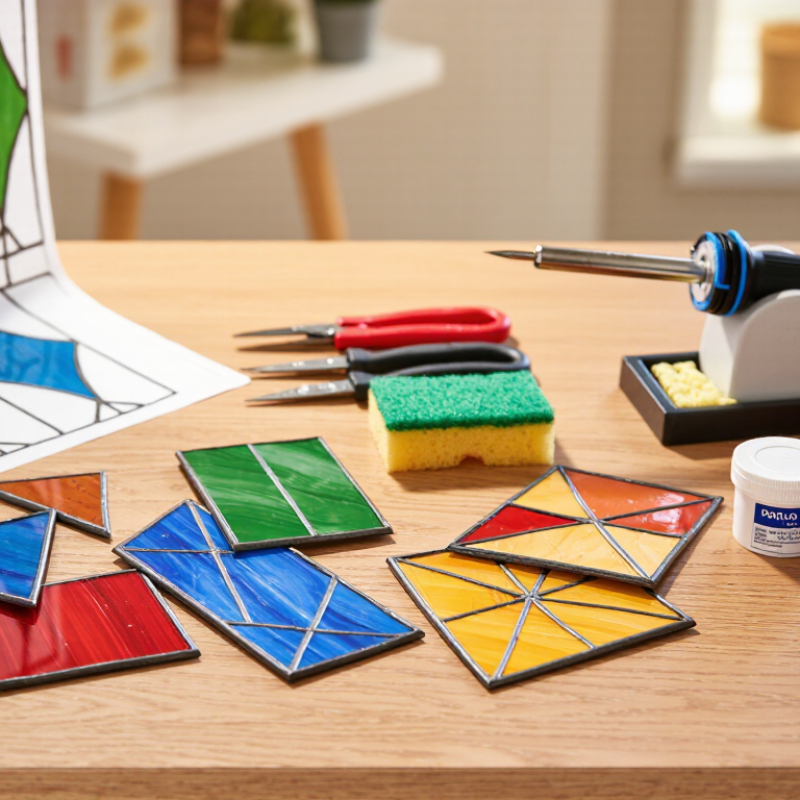
2026 Best Stained Glass Window Kits for Beginners?

Choosing the best Stained Glass Window Kit for beginners in 2026 requires more than comparing prices and colorful packaging. A useful kit should make the first project feel manageable, not mysterious. Beginners often need a clear pattern, pre-cut or easy-to-cut glass, copper foil, solder, flux, safety glasses, and practical instructions. A small sun-catcher can reveal important differences quickly: Does the glass fit the template? Is the copper foil adhesive reliable? Are the instructions readable beside a warm soldering iron?

Industry research supports the broader appeal of hands-on creative hobbies. Grand View Research and Allied Market Research both describe arts-and-crafts as a growing consumer category, supported by home-based activities, online learning, and personalized décor. However, neither report measures beginner stained-glass kits as a separate, fully transparent market segment. That limitation matters. Product claims should not be treated as proven performance.

This guide evaluates 2026 kits through practical testing criteria, including material quality, tool completeness, instructional clarity, workspace safety, and project difficulty. It also considers feedback from experienced makers and manufacturer specifications where available. Some kits look impressive but include weak cutters or insufficient solder. A beautiful box proves little. The best choice may also depend on patience, hand control, ventilation, and budget. Beginner-friendly does not mean risk-free. It means the learning curve is visible, supported, and reasonably forgiving. Expect mistakes. They are part of the craft.

2026 Best Stained Glass Window Kits for Beginners?

What Beginners Should Know About Stained Glass Window Kits in 2026

In 2026, beginner stained glass window kits differ widely in quality and completeness. Some include glass pieces, copper foil, solder, and patterns. Others provide only the basic materials. Check the contents before buying. A beginner-friendly pattern should use simple curves and manageable shapes. Small geometric designs are usually less frustrating than detailed portraits. Start small.

Glass cutting requires patience, eye protection, and a stable work surface. The cutter should feel comfortable in your hand, not merely look professional. Practice on spare glass before touching the project pieces. Uneven cuts can create sharp points and unnecessary waste. Keep a brush nearby for tiny glass fragments. Never sweep them casually onto the floor. Soldering also needs ventilation, heat protection, and careful temperature control. Read every safety instruction supplied with the kit. If the instructions seem vague, that is a warning sign.

Copper foil work often looks easy in photographs. It is not always easy. Foil alignment affects the final seams, and rushed wrapping can make corners peel. Work slowly around each edge. A beginner may produce lines that are slightly uneven. That is normal, but it deserves honest inspection. Before hanging the finished panel, check every joint and edge for weakness. Window exposure adds stress from movement, moisture, and temperature changes. A display panel placed indoors is often a wiser first project. My practical preference is a kit with clear diagrams, measured templates, replacement guidance, and realistic project dimensions. Fancy extras matter less than understandable instructions and safe, repeatable steps.

Essential Tools, Materials, and Safety Features to Check

A beginner stained glass kit should make safety visible, not hide it in fine print. Look for a stable glass cutter, running pliers, grozing pliers, a small grinder, copper foil, flux, solder, and clear instructions. Safety glasses must seal around the eyes. Cut-resistant gloves help, but they cannot replace careful hand placement. A heat-resistant work mat and a proper iron stand are essential near hot solder.

Ventilation deserves equal attention. Flux fumes can irritate the throat and lungs, so choose a kit that supports local exhaust or an open, controlled workspace. NIOSH recommends limiting occupational noise to 85 dBA over eight hours; a small grinder may still need short sessions and hearing protection. Check the NIOSH Pocket Guide before assuming “small” means quiet. It does not.

Lead-free solder may reduce one hazard, but it can behave differently and require more heat. If leaded solder is included, review OSHA 29 CFR 1910.1025, which sets a 50 micrograms-per-cubic-meter exposure limit and a 30 micrograms action level. Wash hands before eating. Never sweep residue dry. The World Health Organization reports that no safe level of lead exposure is known, especially for children and pregnant people. I would also check replacement-wheel availability, though I sometimes overvalue convenience. A kit with excellent tools but vague chemical labels deserves hesitation.

How to Choose a Beginner-Friendly Stained Glass Kit

2026 Best Stained Glass Window Kits for Beginners?

Choosing a beginner-friendly stained glass kit starts with safety and manageable tools. Look for clear instructions, safety glasses, heat-resistant work surfaces, and guidance on ventilation. A temperature-controlled soldering iron is easier to handle than a basic model. It helps reduce overheating and uneven joints.

Start small.

A good starter kit should include pre-cut glass or simple templates, copper foil, solder, flux, cutting guidance, and polishing materials. Pre-cut pieces reduce frustration while you learn grinding and fitting. However, a kit with every tool may not offer the best quality. Check whether the glass cutter feels balanced and whether the instructions explain each step with photos or diagrams.

Pay attention to the project size. A small sun-catcher needs less time, glass, and solder than a large panel. This makes mistakes cheaper and easier to correct. I would also choose a kit with spare glass pieces for practice. Beginners often underestimate how difficult clean edges can be. That is normal.

Read the material list carefully. Some kits use soldering supplies that require extra safety precautions, so follow the supplied guidance and local recommendations. Avoid kits that promise professional results in one afternoon. That claim sounds attractive, but it can create poor expectations. A reliable kit teaches patience, accurate measuring, and controlled hand movements. Look for honest instructions, replaceable consumables, and customer support that explains problems rather than hiding them.

Step-by-Step Guide to Using a Stained Glass Window Kit

A beginner stained glass window kit should turn a complex craft into a controlled sequence. Grand View Research’s 2024 arts-and-crafts market report valued the global market above 40 billion dollars in 2023, reflecting strong interest in hands-on making. However, popularity does not replace preparation.

Lay the pattern on a flat, well-lit table. Check every component before cutting. Wear safety glasses, then score the glass with steady pressure. Do not force a second line over the first. Break the piece gently with running pliers, and keep sharp edges away from your hands. Wrap each fragment with copper foil, pressing the seams flat with a wooden tool. Measure twice.

Arrange the pieces over the pattern before soldering. This catches gaps early. Heat the soldering iron only in a ventilated workspace, and keep the hot tip on its stand between joins. Use compatible solder and follow the kit’s temperature guidance; overheating can crack glass or loosen foil. The U.S. Consumer Product Safety Commission emphasizes safe tool handling and ventilation for household projects, but many beginner guides understate fatigue. Stop when your hands become tense. My first instinct would be to perfect every seam, yet uneven lines can teach more than rushed correction. Clean the finished panel carefully, inspect each joint, and hang it with secure support away from impact zones.

2026 Best Stained Glass Window Kits for Beginners? - Step-by-Step Guide to Using a Stained Glass Window Kit

Beginner Kit Comparison

Kit Type Typical Project Size Included Core Materials Tools Usually Required Skill Level Typical Project Time Best Use Beginner Rating
Small Copper-Foil Starter Kit 15–25 cm wide Pre-cut or simple glass pieces, copper foil, solder, patina, hanging ring, pattern Glass cutter, running pliers, soldering iron, flux brush, safety glasses Beginner 4–8 hours Learning basic cutting, foiling, and soldering on a small design ★★★★★
Pre-Cut Suncatcher Kit 10–20 cm wide Numbered glass pieces, copper foil or lead-free came, solder, pattern, hanging hardware Soldering iron, flux, tweezers, craft knife, safety glasses Beginner 2–5 hours First project when glass-cutting experience is limited ★★★★★
Basic Glass-Cutting Practice Kit 15–30 cm practice panels Small glass sheets, cutting oil, pattern paper, foil, solder, practice shapes Glass cutter, running pliers, grozing pliers, soldering iron, file Beginner to developing 6–12 hours Building confidence with straight lines, curves, and controlled breaks ★★★★☆
Lead-Free Came Panel Kit 20–35 cm wide Glass pieces, lead-free came, solder, flux, pattern, reinforcement wire Came knife, glazing cement, soldering iron, pliers, safety glasses Developing beginner 8–14 hours Learning a structured assembly method with fewer foil-wrapped edges ★★★☆☆
Foiled Garden or Geometric Panel Kit 25–45 cm wide Multiple glass colors, copper foil, solder, patina, hanging hardware, full-size pattern Glass cutter, pliers, soldering iron, grinder or abrasive stone, flux Beginner with supervision 10–18 hours Creating a larger decorative panel after completing a small project ★★★★☆

Selection note: For a first project, a pre-cut suncatcher or small copper-foil kit is usually the easiest option. A kit that includes a full-size pattern, numbered pieces, copper foil, solder, flux, and clear safety instructions reduces the amount of extra equipment needed.

What to Check Before Buying

Check Point Recommended Beginner Specification Why It Matters
Project complexity Approximately 8–20 pieces with mostly straight or gently curved edges Fewer pieces make cutting, fitting, foiling, and soldering easier to control.
Pattern quality Full-size printed pattern with piece numbers and a cutting-line allowance A clear pattern helps maintain accurate alignment throughout assembly.
Glass preparation Pre-cut pieces for absolute beginners, or small sheets for learners who want cutting practice Pre-cut glass lowers the initial difficulty; sheet glass provides more practice.
Soldering equipment Temperature-controlled soldering iron suitable for stained-glass work Stable heat makes it easier to create even seams and reduces accidental overheating.
Foil consistency Copper foil wide enough to cover the glass edge evenly on both sides Even foil placement supports stronger, cleaner solder seams.
Safety supplies Safety glasses, cut-resistant handling practices, ventilation guidance, and heat protection Glass edges, flux fumes, hot solder, and sharp tools require appropriate precautions.

Step-by-Step Guide to Using a Stained Glass Window Kit

Step Task How to Do It Quality Check Typical Time
1 Read the instructions and prepare the workspace Cover the work surface, organize the numbered pieces, and place safety equipment within reach. The surface is stable, well lit, and free of food or unnecessary objects. 10–20 minutes
2 Match the glass to the pattern Place each piece over the corresponding pattern section. Confirm color, orientation, and number before foiling. All pieces are present and the design outline is complete. 10–30 minutes
3 Cut the glass if the kit requires it Apply one firm score with the glass cutter, then use running pliers to open the score. Break gradually rather than forcing the glass. The edge follows the pattern and has no large uncontrolled chips. 1–5 minutes per piece
4 Refine and clean the edges Use grozing pliers or an abrasive stone to remove small irregularities. Wipe away glass dust with a damp disposable cloth. Pieces fit together with a small, consistent gap and no sharp snagging points. 2–6 minutes per piece
5 Apply copper foil Center the adhesive foil on the glass edge, press it down evenly, and burnish both faces with a fid or smooth tool. The foil is tight, smooth, and continuous around the perimeter. 2–5 minutes per piece
6 Arrange and tack-solder the pieces Reassemble the design on the pattern. Apply small solder tacks at key joints to hold the layout in place. The design remains aligned and the joints do not shift when lightly touched. 20–45 minutes
7 Solder the seams Apply a small amount of flux, then move the heated soldering iron steadily along each foil seam. Work in short sections. The solder covers the foil evenly without large blobs, gaps, or overheated glass. 30–90 minutes
8 Finish the edges and add hardware Solder the perimeter, attach a hanging ring or reinforcing wire if supplied, and allow the piece to cool naturally. The panel is stable, the hardware is secure, and no sharp solder points remain. 20–45 minutes
9 Clean and apply patina if included Remove flux residue according to the kit instructions. Apply patina sparingly and polish the finished surface. The surface is clean, dry, evenly colored, and free of residue. 20–40 minutes
10 Inspect and display Check every seam, edge, and hanging point before placing the panel near a window. No loose pieces, exposed sharp edges, unstable joints, or weak hanging points are visible. 10–15 minutes
Safety reminder: Stained-glass work involves sharp glass, hot tools, flux, solder, and potentially hazardous dust or fumes. Wear eye protection, keep the workspace ventilated, wash hands after handling materials, and follow the specific safety instructions supplied with the kit. Keep children and pets away from the work area.

Common Beginner Mistakes and Ways to Avoid Them

Choosing a 2026 stained glass window kit is only half the challenge. Many beginners select complex patterns with tiny pieces and sharp curves. A smaller, geometric design builds better control. The Craft and Hobby Association reports that beginners often value guided projects and manageable learning steps. Do not ignore that evidence. Your first panel should teach you, not test your patience.

Safety mistakes are more serious. Beginners may grind glass without sealed eye protection, sweep shards with bare hands, or solder beside an open window without local ventilation. Prevent Blindness reports about 2.4 million eye injuries occur annually in the United States. That figure is not specific to stained glass, but it shows the risk is real. Lead solder also requires discipline. OSHA’s lead standard sets an eight-hour exposure limit of 50 micrograms per cubic meter. Wash your hands, keep food away, and use a suitable fume-extraction setup. I once underestimated ventilation because the room smelled clean. That was poor judgment.

Accuracy creates another problem. New makers often cut directly on the pattern, losing small measurements. Use a permanent marker, account for the foil line, and check every piece before grinding. Do not force glass into place. Cracks usually begin with pressure, not bad luck. Keep your soldering iron moving, because overheating can damage foil and burn the work surface. Let the panel cool between sections. It feels slower. It is safer.

Contact us

Please fill out the enquiry form, and our dedicated team will promptly attend to your request