How to Use a Car Battery Jumper?
A flat battery can turn an ordinary morning into a quiet car, a dim dashboard, and a missed appointment. ADAC’s 2024 Pannenstatistik recorded about 3.5 million roadside breakdowns in Germany during 2023; 44.1% involved the starter battery. That is a lot. The figure shows why knowing how to use a Car Battery Jumper is a practical skill, not just an emergency trick.
This guide explains how to identify the right equipment, prepare the vehicle, and connect a portable jump starter or jumper cables safely. The two methods are related, but their connection steps and manufacturer instructions can differ. Check your owner’s manual before starting, confirm the system voltage, and inspect the battery for cracks, leaks, or swelling. Stop if anything looks damaged. A jump may restore power, but it does not repair a failing battery or charging system. That distinction is easy to miss when you are cold, rushed, and watching the headlights flicker. The instructions ahead focus on careful connections, clear safety checks, and what to do after the engine starts. They cannot replace the manual for your specific vehicle or jumper. A little hesitation is sensible here; a reversed clamp or overlooked warning can cause damage.
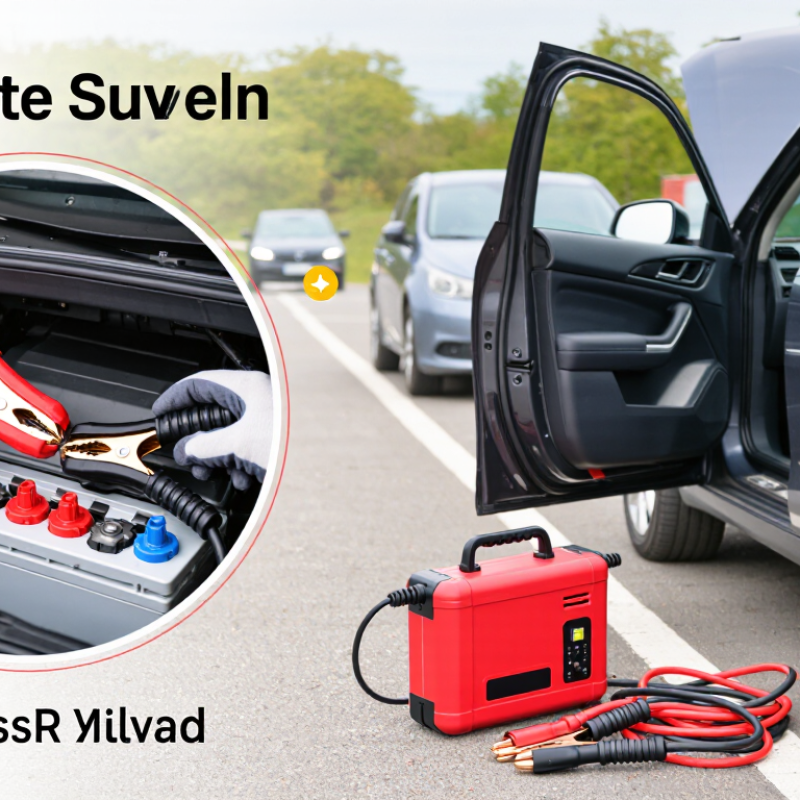
Check Safety Requirements and Prepare the Vehicle
Before using a car battery jumper, read the owner’s manual for both vehicles. Jump-starting points and procedures can differ, especially in vehicles with remote terminals or hybrid systems. A few minutes of checking matters. Park on firm, level ground, away from traffic, and keep the vehicles from touching. Set both parking brakes, shift to Park or Neutral, switch off the ignitions, and turn off lights and accessories.
Inspect the battery before connecting anything. Do not jump-start a battery that is cracked, leaking, swollen, or frozen; acid and internal damage can make the situation dangerous. Check that the jumper cables are rated for the vehicle and have no exposed wires, loose clamps, or melted insulation. Wear eye protection, remove metal jewelry, and keep cigarettes, flames, and sparks well away. Batteries can release flammable gas.
Let the engine cool if the battery area is hot, and make sure the work area has plenty of ventilation. Keep children and pets clear. If the battery is hard to reach, or the manual’s instructions are unclear, pause and ask a qualified technician rather than guessing. It is easy to rush when a car will not start; that is exactly when a missed safety check can matter.
Identify the Jumper’s Controls, Cables, and Battery Terminals
Before connecting a car battery jumper, place it on a dry, stable surface and inspect its case, clamps, and cables. Look for a power button, charge indicator, polarity warning, and any boost control. Controls vary, so check the unit’s instructions before switching it on. A flashing warning is not decoration; it may signal reversed clamps or a poor connection.
Find the battery’s positive terminal, usually marked “+” and often covered by a red cap. The negative terminal carries a “−” mark. On the jumper, red means positive and black means negative. Keep clamps apart while connecting them. I still pause here; the markings can be small, especially in dim light. Follow the jumper’s connection sequence, and use an approved grounding point if its instructions specify one.
ADAC’s 2024 breakdown statistics report that starter-battery problems caused 44.1% of roadside breakdowns in Germany in 2023. That figure makes terminal identification worth a careful check. Attach the red clamp to positive, then connect the black clamp as directed by the manual. Never proceed with cracked insulation, loose clamps, or a swollen battery. If the polarity alarm sounds, stop and correct the connection before starting.
Connect the Jumper to the Car Battery in the Correct Order
How to Use a Car Battery Jumper?
Connect the Jumper to the Car Battery in the Correct Order
Park the vehicles close enough for the cables to reach, but keep them from touching. Switch off both ignitions and electrical accessories. Check the disabled car’s manual, since connection points can vary. ADAC’s 2023 breakdown statistics reported that starter-battery faults accounted for 44.1% of roadside breakdowns, making careful battery handling a common, practical skill. Do not jump-start a battery that is cracked, leaking, swollen, or frozen.
With both vehicles off, attach the red clamp to the disabled battery’s positive (+) terminal. Connect the other red clamp to the donor battery’s positive terminal. Attach one black clamp to the donor battery’s negative (–) terminal. Put the final black clamp on an unpainted metal ground point on the disabled vehicle, away from its battery and moving parts. This order helps keep a possible spark away from battery gases. Slow down. I know the last clamp can feel awkward, but guessing at a connection is a poor trade.
Tips: Keep clamps from touching each other. Start the donor vehicle, wait a few minutes, then try the disabled car. If it does not start, stop and check the manual rather than repeatedly cranking. Once running, remove clamps in reverse order: ground, donor negative, donor positive, then disabled-car positive. Keep the cables clear of fans and belts.
How to Use a Car Battery Jumper: Correct Connection Order
Connection order: Attach the red clamp to the discharged battery’s positive terminal, then the other red clamp to the donor battery’s positive terminal. Attach a black clamp to the donor battery’s negative terminal, then the remaining black clamp to an unpainted metal ground point on the disabled vehicle, away from its battery. Follow the vehicle manuals, and remove the clamps in reverse order after starting.
Start the Vehicle and Confirm the Battery Is Responding
Once the jumper is connected according to its instructions, sit in the driver’s seat and turn the key or press the start button. Crank for only a few seconds. If the engine does not catch, stop and wait briefly before trying again; repeated long attempts can overheat the starter or cables. Listen for a steady engine sound, not just a click. That matters.
When the engine starts, let it idle while you watch the dashboard. A dim battery warning light should go out, and the headlights should stay reasonably bright. If the engine sputters, stalls, or the warning light remains on, the battery may still be weak, or the charging system may need attention. A running engine is encouraging, but it does not prove the battery is healthy. I once assumed a successful start meant the problem was solved; the car failed again later that day.
Follow the jumper’s manual for when and how to remove its clamps. Keep the clamps apart, and avoid moving them near belts or fans. If the vehicle will not start after a few careful attempts, stop rather than forcing it. Check that the connections are secure and correctly placed, then seek help if needed. A battery test can confirm whether it accepts and holds a charge.
Disconnect the Jumper Safely and Store It Properly
How to Use a Car Battery Jumper?
Disconnect the Jumper Safely and Store It Properly
Once the engine starts, let it run and switch off lights, fans, and other accessories. Remove the clamps in reverse order from how you connected them: black clamp from the grounded metal point, black clamp from the donor battery, red clamp from the donor battery, then red clamp from the revived battery. Keep each clamp clear of moving parts and painted surfaces. Never let the clamps touch each other or another metal object. It is easy to rush this step; a brief pause helps prevent a spark or accidental short. Follow your vehicle’s manual if its instructions differ.
Tips: Hold each clamp by its insulated handle, not its metal teeth. Coil the cables loosely after use; tight bends can damage the wires. Check for cracked insulation, loose clamps, or corrosion before putting them away. Store the jumper in a dry, cool place, away from water and extreme heat. Let it cool first. If the cables are damp, dry them fully before storage. A tidy trunk compartment can help keep the clamps from striking tools or other metal items while you drive.
| Step | What to Do | Safety Check |
|---|---|---|
| 1. Switch off the jump starter | If using a portable jump starter, turn it off before removing the clamps, unless its instructions specify otherwise. | Keep the clamps from touching each other or any metal part of the vehicle. |
| 2. Remove the negative clamp | Remove the black negative clamp from the vehicle’s designated ground point first. For a portable jump starter, then remove it from the unit if applicable. | Follow the vehicle and jump-starter manuals; some models have a specific removal procedure. |
| 3. Remove the positive clamp | Remove the red positive clamp from the battery’s positive terminal, then disconnect it from the portable unit if applicable. | Do not let the red clamp touch the negative terminal, vehicle body, or another metal surface. |
| 4. If using jumper cables | Disconnect in reverse order from the connection sequence: remove the black clamp from the grounded vehicle point, black from the donor battery, red from the donor battery, then red from the previously discharged battery. | Keep the cable clamps separated while removing them. Follow the vehicle manuals if their instructions differ. |
| 5. Inspect and clean | Check clamps and cables for damaged insulation, loose connections, corrosion, or heat damage. Wipe away dirt and moisture with a dry cloth. | Do not use damaged equipment; have it inspected or replaced before the next use. |
| 6. Store the equipment | Secure the clamps so they cannot make contact, coil the cables without sharp bends, and place the equipment in its case or storage compartment. | Store it in a dry, ventilated place away from fuel, water, and loose metal objects. Observe the temperature limits in the product manual. |
| 7. Maintain a portable jump starter | Check its charge periodically and recharge it according to the manufacturer’s instructions. | A jump starter’s recommended charge level and maintenance interval vary by model; use the manual rather than assuming one universal schedule. |
Article Source:
Contact us
Please fill out the enquiry form, and our dedicated team will promptly attend to your request