Why Use Wedge Anchors for Concrete Applications?
When a steel bracket must stay firmly against concrete, the connection method matters. Wedge Anchors provide a direct, dependable solution for many structural and commercial applications. They are installed through a drilled hole, then tightened with a nut and washer. As the anchor tightens, its expansion clip presses against the concrete wall. This creates strong friction and holding power.
Their performance depends on more than anchor strength. Hole diameter, drilling depth, concrete condition, edge distance, and installation torque all influence the result. Dust left inside a 16-millimeter hole can reduce contact. A cracked slab may require a different anchoring strategy. Small details matter. Experienced installers clean the hole carefully, check embedment depth, and use a calibrated torque wrench when specifications require it.
Wedge Anchors work especially well for equipment bases, handrails, steel frames, and support brackets. They offer consistent installation and immediate fastening, which can save time on busy construction sites. However, they are not a universal answer. Lightweight concrete, damaged concrete, shallow edges, or repeated vibration may change the design decision. Project engineers should review load requirements, anchor spacing, concrete strength, and applicable building standards before approval. Manufacturer data should guide selection and installation, not habit alone.
A reliable installation also includes inspection. The anchor should sit squarely, the washer should remain properly seated, and the nut should receive the specified torque. Even experienced crews can miss one step under pressure. Careful verification protects the connection and exposes weak assumptions before they become expensive repairs.
What Wedge Anchors Are and How They Work
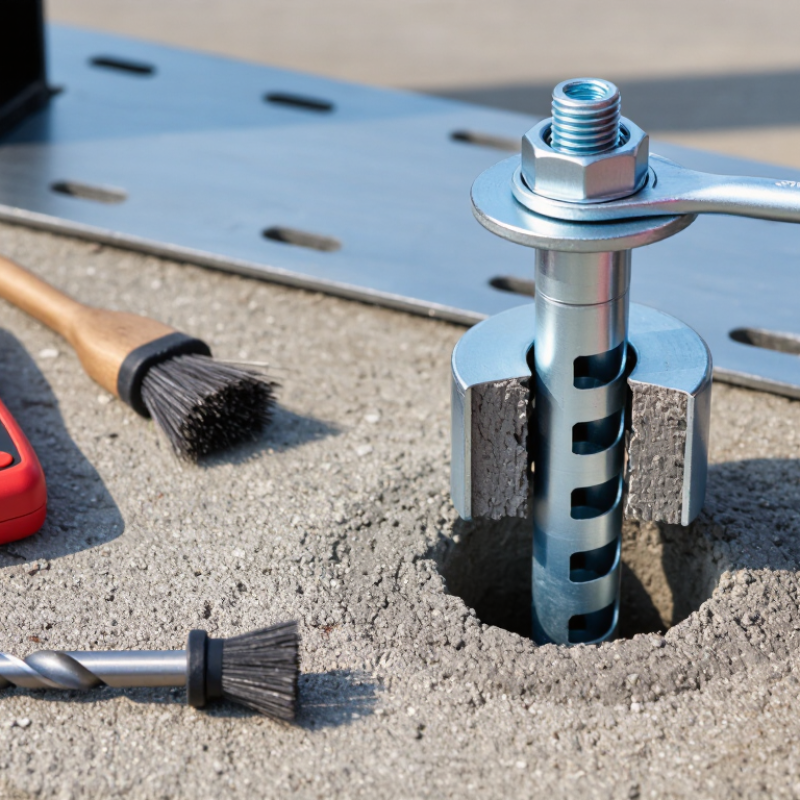
A wedge anchor is a mechanical fastener designed for solid concrete. It usually contains a threaded stud, nut, washer, and expansion clip. The installer drills a hole slightly deeper than the required embedment. After cleaning the hole, the anchor is inserted and tapped into place. Tightening the nut pulls the stud upward. This action forces the clip against the concrete wall, creating strong friction and mechanical interlock. The connection becomes tighter as the load increases, within its rated limits.
Wedge anchors work best when installation matches the technical requirements. Hole diameter, embedment depth, edge distance, concrete strength, and tightening torque all matter. A dusty hole can reduce holding power. A shallow hole may leave the anchor vulnerable to pullout. Field crews often focus on speed, but rushing this step creates avoidable problems. Concrete may also be cracked, weathered, or weaker than expected. That uncertainty deserves attention. Select an anchor with suitable material and corrosion resistance for indoor, outdoor, or damp locations. Always check current engineering data and installation instructions.
Tips: Use the correct drill bit and remove dust with brushing and air cleaning. Mark the required depth before drilling. Keep the anchor away from concrete edges unless approved spacing is available. Tighten with a calibrated torque wrench when the specification requires it. If the anchor spins during tightening, stop and inspect the hole, because the connection may not be reliable.
Why Use Wedge Anchors for Concrete Applications?
Wedge anchors are mechanical fasteners designed for securing fixtures to concrete. When the anchor is tightened, the threaded stud pulls the expansion clip toward the anchor body, forcing it against the sides of the drilled hole. This creates friction and mechanical interlock that transfers tension and shear loads into the concrete.
The chart shows the nominal diameter and standard coarse-thread tensile-stress area for common wedge-anchor thread sizes. Steel thread area is only one design factor; actual anchor capacity also depends on concrete strength, embedment depth, edge distance, spacing, installation quality, and the specific tested anchor system.
Key Benefits of Wedge Anchors in Concrete
Why Use Wedge Anchors for Concrete Applications?
Key Benefits of Wedge Anchors in Concrete
Wedge anchors provide strong, dependable fastening in solid concrete. Their expansion clip grips the drilled hole as the nut tightens. This creates a secure connection for base plates, guardrails, equipment supports, and structural frames. On active construction sites, installers value their direct installation process. Drill, clean, position, and tighten. The method is simple, but every step matters.
Their main benefit is load reliability. Properly selected anchors can resist tension and shear forces when installed in suitable concrete. They also offer consistent holding power under vibration and moderate environmental stress. Galvanized or stainless-steel options can improve resistance to moisture and corrosion. However, material choice should match the exposure conditions. Indoor concrete needs differ from coastal or chemical environments.
Installation quality controls performance. The hole diameter and depth must match the anchor specifications. Dust left inside the hole can reduce effective engagement. Not ideal. Edge distance and spacing also require careful attention, especially near corners. Over-tightening may damage the concrete or anchor assembly. Under-tightening may prevent full expansion. Torque matters. Load tables, concrete strength, and site testing should guide final selection. Wedge anchors are not a universal fix. A qualified installer should review cracked concrete, overhead fastening, and unusually high loads before work begins.
Concrete Conditions Suitable for Wedge Anchor Installation
Why Use Wedge Anchors for Concrete Applications?
Concrete Conditions Suitable for Wedge Anchor Installation
Wedge anchors perform best in sound, fully cured concrete with enough thickness for the required embedment. Dense concrete provides reliable expansion and helps transfer loads into the base material. Fresh, weak, spalled, or severely cracked concrete needs careful evaluation before installation. It may not provide dependable holding strength.
The surface must be free from loose dust, oil, and damaged material. A clean hole matters. The drilled diameter, depth, and anchor embedment should match the approved technical requirements. Field technicians should remove drilling dust with brushing and compressed air. A small amount of debris can reduce contact between the anchor and concrete.
Keep suitable distances from edges, corners, and nearby anchors. Concrete can split when spacing is too small. Reinforcement should also be located before drilling, especially in heavily reinforced slabs and beams. Avoid cutting structural steel without engineering approval. I have seen installation plans fail because the drawing ignored a concealed bar.
Wedge anchors are not automatically suitable for brick, block, asphalt, or thin concrete sections. Cracked concrete may require anchors specifically assessed for cracked conditions. Moisture is not always a problem, but standing water can hide weak concrete and complicate hole cleaning. The calculation is not the whole story. Inspect the base material, follow the applicable construction standard, and verify tightening with a calibrated tool. A final visual check still catches simple mistakes.
How to Choose and Install the Right Wedge Anchor
Why Use Wedge Anchors for Concrete Applications?
How to Choose and Install the Right Wedge Anchor
Selecting a wedge anchor starts with the concrete, not the bolt diameter. ACI 318-19 Chapter 17 requires checks for tension, shear, edge distance, spacing, and cracked concrete. ICC-ES AC193 evaluates mechanical anchors through standardized qualification tests. These references guide decisions, but they do not replace a site inspection.
Match the anchor to the load and environment. Confirm its diameter, effective embedment, steel strength, and corrosion resistance. For damp locations, stainless steel may be appropriate. Check the evaluation report instead of trusting a product label. ASTM E488/E488M measures anchor strength in tension and shear. Field capacity can still fall when holes are shallow, dusty, or too close to an edge. Real concrete is less polite than a spreadsheet.
Mark each hole carefully and drill perpendicular to the surface. Use the specified bit diameter and remove dust completely. Set the anchor to the required embedment, then tighten it with a calibrated torque wrench. Do not guess the torque. Over-tightening may damage threads or concrete. Under-tightening may reduce clamping force. Record the anchor type, depth, torque, and inspection results. I have seen failures caused by one assumed measurement. That shortcut deserves skepticism. Verify spacing and edge distance before loading the connection, especially near corners or repaired concrete.
Safety Considerations and Common Installation Mistakes
Why Use Wedge Anchors for Concrete Applications?
Wedge anchors provide strong, predictable fastening in solid concrete when installed correctly. Their expanding clip grips the drilled hole under tension, making them useful for handrails, equipment bases, and structural supports. Safety must come first. The U.S. Bureau of Labor Statistics reported 1,069 construction fatalities in 2022, including 395 fatal falls. This highlights why securely fixed guards, rails, and platforms matter.
Common installation mistakes often begin before the anchor enters the hole. Workers may use the wrong diameter bit, drill too shallow, or ignore the specified edge distance. Dust left inside the hole can reduce expansion and holding strength. A clean-looking hole can still be unsafe. Blow, brush, and blow again, when the engineering instructions require it. Never substitute impact tightening for the specified torque. Over-tightening can damage the concrete or the anchor.
Read the project drawings and the qualified anchor instructions every time. ACI 318-19 and ACI 355.2 emphasize design requirements, concrete condition, spacing, embedment, and installation control. OSHA guidance also supports competent-person oversight for construction hazards. Inspect cracked concrete before drilling, and stop when the substrate differs from the design assumption. I once thought a deeper hole was automatically safer; it was not. Embedment must match the tested system, not personal judgment. Record torque checks and rejected holes. Small shortcuts become expensive failures.
| Safety Dimension | Why Wedge Anchors Are Used | Recommended Installation Practice | Common Mistake | Risk and Verification |
|---|---|---|---|---|
| Load Transfer | The expansion clip transfers tension and shear loads into sound concrete, making the anchor suitable for many structural and non-structural attachments when properly designed. | Select an anchor diameter, embedment, steel grade, and concrete condition that comply with the applicable design specification and product evaluation data. | Choosing an anchor based only on bolt diameter or appearance without checking required tension, shear, and combined loading. | Insufficient capacity or premature pullout. Confirm the design values and the required safety factors before installation. |
| Concrete Condition | Wedge anchors require a solid base material to develop reliable expansion and load resistance. | Install only in sound concrete unless the selected anchor is specifically approved for another base material. Avoid cracked, spalled, hollow, or deteriorated areas. | Installing into weak concrete, masonry joints, thin slabs, or areas with visible damage. | Concrete breakout, reduced holding strength, or sudden fixture movement. Inspect the base material and confirm its thickness and condition. |
| Hole Diameter and Depth | A correctly drilled hole allows the anchor body and expansion clip to engage the concrete as intended. | Use a drill bit diameter specified for the anchor and drill to the specified depth. The hole must be deeper than the required embedment so drilling dust does not block full insertion. | Using a worn or incorrectly sized bit, drilling too shallow, or relying on an unmarked drill depth. | The anchor may not reach the required embedment or may fail to expand correctly. Check bit condition and measure hole depth during installation. |
| Hole Cleaning | Clean contact surfaces help the expansion clip engage the concrete instead of sliding over drilling dust. | Remove dust and loose debris using the cleaning sequence required by the anchor instructions, commonly brushing and blowing with suitable equipment. | Leaving dust in the hole or using compressed air without controlling airborne debris and contaminants. | Reduced friction and lower pullout resistance. Inspect the hole and repeat cleaning if dust remains visible. |
| Edge Distance and Spacing | Adequate distance from edges and between anchors reduces concrete splitting and breakout. | Follow the specified minimum edge distance and anchor spacing for the selected diameter, embedment, concrete strength, and load direction. | Placing anchors too close to slab edges, corners, openings, or adjacent anchors. | Cracking, edge breakout, or reduced group capacity. Mark anchor locations and verify dimensions before drilling. |
| Reinforcement and Utilities | Correct placement prevents damage to reinforcing steel, post-tensioning tendons, conduits, and embedded services. | Review drawings and scan the drilling area where required. Stop if reinforcing steel or an embedded service is encountered; do not force the drill through it. | Drilling blindly or relocating an anchor without rechecking edge distance, spacing, and load requirements. | Structural damage, electric shock, flooding, or loss of tendon capacity. Record the final anchor location and obtain approval for changes. |
| Tightening Torque | Applying the specified torque sets the expansion mechanism and secures the attached fixture. | Use a calibrated torque wrench and apply the exact torque listed for the selected anchor. Keep the fixture seated and aligned while tightening. | Under-torquing, over-torquing, hammering the nut, or using an impact tool without a controlled torque check. | Insufficient expansion, damaged threads, or concrete damage. Record torque checks for safety-critical installations. |
| Corrosion Protection | Proper material selection helps maintain cross-section and performance in humid, exterior, or chemically exposed environments. | Match the anchor material and coating to the exposure. Stainless steel or other corrosion-resistant options may be required in severe environments; verify compatibility with the surrounding materials. | Using a standard carbon-steel finish outdoors or combining dissimilar metals without considering galvanic corrosion. | Rust, section loss, seized threads, and reduced long-term capacity. Inspect exposed anchors periodically for corrosion or damage. |
| Personal Protective Equipment | Concrete drilling creates dust, noise, vibration, and flying particles that can injure workers. | Use eye protection, hearing protection, suitable respiratory protection, gloves, and dust-control methods required by the site risk assessment. | Dry drilling without dust extraction or operating equipment without securing the work area. | Silica exposure, eye injuries, hearing damage, or loss of tool control. Verify that dust suppression and PPE are in place before drilling. |
| Final Inspection | Visual and torque checks provide a practical way to identify installation defects before the attachment is loaded. | Confirm anchor size, embedment, washer and nut position, fixture contact, edge distance, torque, and the absence of cracks or concrete breakout. | Loading the connection immediately without documenting installation details or correcting visible defects. | Hidden installation errors can become service failures. Keep an inspection record for critical connections and follow the engineer's acceptance criteria. |
Article Source:
Contact us
Please fill out the enquiry form, and our dedicated team will promptly attend to your request